Introduction
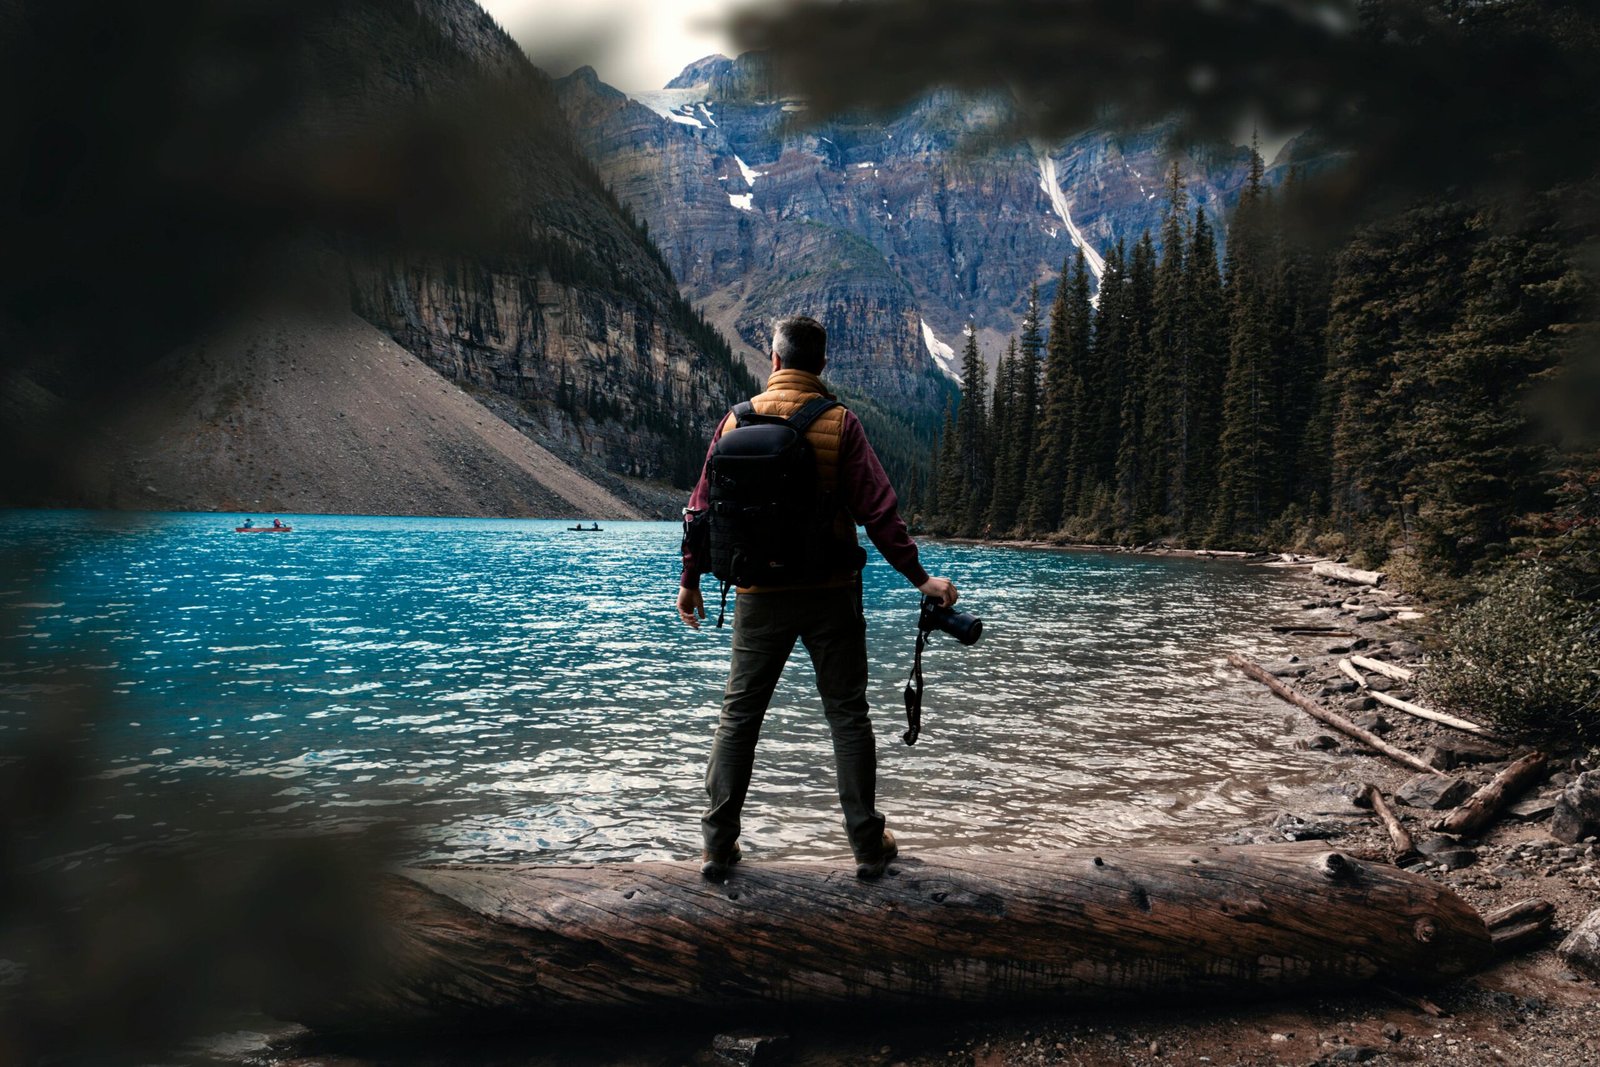
Travel photography is riding a wave of popularity like never before. It’s not just the realm of globetrotters and jet setters anymore, with regular folks also diving head first into this exhilarating field. And why wouldn’t they? Immortalizing memories, landscapes, incidents, and humans while you travel is an irresistible prospect. From social media bloggers and influencers, who use it as a tool to narrate their global escapades, to casual tourists capturing a family trip, the importance of good travel photography has skyrocketed.
This surge, along with the ever-evolving tech capabilities of our pocket cameras (read smartphones), has democratized the photography scene. Today, creating visually arresting images isn’t just about expensive gear. It’s about the eye behind the viewfinder and the knowledge that fuels it.
So, if you’re a wide-eyed beginner trying to figure out what an ISO is or a shutterbug wanting few extra tips, you’re in for a treat. What we promise, as we venture into this exciting journey, is not a confusing jargon-loaded discourse, but a beginner-friendly, insightful guide that will help you snap travel photographs in a better and more gratifying way. Buckle up and turn on the explorer mode; it’s time for a photographic adventure!

Understanding the Basics of Photography
Before you jet off to picturesque scenes and breathtaking landscapes, it’s crucial to grasp the basics of photography. These are your tools, your building blocks if you will, that would help you capture travel images that are not just ‘good enough’ but simply captivating.
Firstly, let’s talk about the trio that is the backbone of photography – Aperture, Shutter Speed, and ISO. Understanding their individual roles in controlling the exposure, depth of field, motion control, and light sensitivity might seem convoluted at first, but trust me, it’s akin to mastering the clutch-gear-accelerator coordination routine in driving. Intimidating initially, but second nature before you know it.
Aperture controls the size of the opening in the lens through which light passes. A larger opening (represented by a lower f-number) allows more light to hit the sensor, creating a shallow depth of field. Shutter speed, on the other hand, determines how long your shutter remains open. A slow shutter speed creates motion blur, which can be fantastic for cascading waterfalls, while a fast shutter speed freezes motion, perfect for capturing a bird mid-flight. Lastly, ISO determines how sensitive your camera is to light. Low ISO values are ideal for bright conditions, whereas higher ISO allows for better photos in low light conditions.
However, photography is about balance. It’s practically a dance, where aperture, shutter speed, and ISO move harmoniously to produce well-exposed and sharp photos regardless of the lighting conditions. Understand that adjusting one can and will affect the others, so it’s all about mastering compensations and adjustments.
Now, there’s this inevitable force that plays a significant role in your travel photography adventure; light. You might not have the ability to change the lighting conditions in the Grand Canyon or the streets of Tokyo, so, the only way out is learning to play along. Light can be your trusted ally or ambitious challenge, and mastering these basics will turn you from just another victim of difficult light into an opportunistic maestro capturing transient but incredible moments.
Remember, photography is essentially writing with light. The more efficiently you control this narrative, the better your story. So, before you embark on your next journey, spend some time shooting in different lighting conditions around your neighborhood. Try adjusting the parameters to get a knack for these crucial elements of photography, and see how they intimately interact with each other. The journey might involve some trial and error, but that’s the beauty of it! When you’ve perfected these basics, you’re one step closer to capturing travel photos that tell captivating stories.

Choosing the Right Camera and Equipment
In your quest to master travel photography, the integrity of your equipment can make all the difference. Acquiring the right resources isn’t just for Instagram’s sake; your camera, lenses, and supplementary gears play a large role in capturing moments that traverse beyond the realm of ordinary.
There’s an extensive range of cameras out there, from sophisticated DSLRs and mirrorless cameras that professional photographers swear by, to compact point-and-shoots or even advanced smartphone cameras. Need a robust, multi-purpose camera with the capability to switch lenses? A DSLR or a mirrorless camera would fit the bill. However, if convenience and portability outweigh all, a high-end point-and-shoot or a camera smartphone might be your companion on the road.
Speaking of lenses, your choice can drastically alter your photos. Consequently, diverse travel scenarios require different types of lenses. A wide-angle lens is great for sweeping landscape shots and tight spaces, while a telephoto lens helps you capture details from afar. That said, a versatile zoom lens that covers a wide range could be a practical choice for beginners or minimalist travelers.
Strolling along cobblestone streets or hiking up emerald mountains, you wouldn’t want blurriness to mar your images. That’s where tripods come to your rescue. Even the most minute tremble can result in blurry photos, especially in dim lighting. Besides providing stability, tripods also aid in capturing long-exposure shots, star trails, or even your own inclusive group shots.
A sturdy camera bag is a non-negotiable item for protecting your investment. Choose one that’s weather-resistant, comfortable, and provides easy access to your gear. Also, keep room for additional accessories like spare batteries, memory cards and a cleaning kit.
Chemistry between a photographer and his gear is crucial. Take your time, do your research, and understand your own style and requirements. The right equipment serves as an intuitive extension of your perspective, helping you freeze those transient moments into tangible memories with ease.

Framing and Composition Tips
Consistently impressive travel photos depend significantly on how they’re composed. Framing and composition, to put it simply, is about arranging elements within your camera’s viewfinder in a way that accentuates your subject and augments the aesthetic appeal of your photo. Let’s delve into a few game-changing framing and composition rules for photography.
The Rule of Thirds
The first rule we will discuss is the renowned Rule of Thirds.
- What is it?
- Imagine dividing your frame into nine equal boxes – three horizontal and three vertical – much like a tic-tac-toe grid.
- How to use it?
- The philosophy here is that your critical elements should fall on these lines or their intersections, rather than the center of your frame. This arrangement offers a more interactive experience to your viewer, leading their eyes across your photo, creating interest, and establishing balance.
Leading Lines
Next, we’ll delve into the concept of Leading Lines.
- What are they?
- These are natural paths for the eye to follow, leading directly towards your subject.
- How to use them?
- Roads, bridges, tracks, rivers, rows of trees, or buildings – anything linear can play this part. By using leading lines, you slowly guide the viewer’s gaze into and around your photograph, making the shot more engaging.
Rules are Meant to be Broken
Of course, these rules aren’t set in stone. They serve as reliable guides when you’re starting out or in doubt. However, don’t shy away from breaking these rules occasionally when your creative instincts compel you. Afterall, the real magic lies in exploration and experimentation.
(Note: At this point in the article, visuals demonstrating the Rule of Thirds and Leading Lines would be inserted.)
Despite these rules, it’s important to remember that the goal is to enhance your photography, helping you transition from merely ‘taking’ photos to truly ‘making’ them. This will shape your travel memories in a more vivid and appealing way. So, unlock your creativity, keep snapping, and above all, enjoy the process.

Natural Light and The Golden Hour
In the glided treasure troves of photography, one gem stands out: the Golden Hour. This refers to a brief period shortly after sunrise or before sunset during which daylight is warmer and softer than when the Sun is higher in the sky. Often, the Golden Hour gifts the world with a magical light, casting everything it touches with a gentle golden hue, resulting in breathtakingly beautiful photographs.
Proper utilisation of natural light can dramatically influence the visual aesthetics of your travel photos. Natural light plays a vital role in carving details and highlighting textures of your subject. Additionally, understanding the properties of natural light can help in creating dramatic effects and mood in photographs.
So, how do you leverage this beautiful natural light? Firstly, know your timings! The Golden Hour is more a science than a guessing game – it occurs precisely at sunrise and sunset, although the exact timings vary depending on location and season. Numerous apps and websites provide precise sunrise and sunset times. However, keep in mind that weather conditions like overcast skies can influence the light quality.
Secondly, set your composition in perspective of the light. Use the low-angled, diffused sunlight to create elongated shadows, highlight contrasts, and play with silhouettes. The Golden Hour also provides a perfect opportunity for backlit and side-lit shots, painting a dreamy aura around the subjects.
Lastly, don’t hesitate to experiment with different exposure settings. During this time, the intensity of light changes more rapidly compared to other parts of the day. So, play around with your camera’s settings to capture the gloriously moody tones authentically.
Remember, the beauty of photography lies in its relationship with light. Learn to court sunlight, and your travel photos can transform from impressive snaps to poignant stories.

Exploring Various Photography Styles
Stepping into the world of photography, you’ll soon discover a myriad of styles to explore. Variety is the spice of life and can significantly enhance your travel photos.
Landscape Photography
The first style to consider is landscape photography. This style captures spaces within the world, which can be anything from vast and endless landscapes to tiny, detailed scenes. This is your go-to style if your travels take you to awe-inspiring locations such as mountains, forests, beaches, or dense cityscapes.
- Motto: Capturing nature’s grandeur and showcasing it in a frame.
Portrait Photography
Next up is portrait photography. The people you encounter during your travels become a vital part of your travel story. This style primarily focuses on the human subject, whether it’s a candid shot of a local local in their weekday routine or a composed photo of a fellow adventurer.
- Motto: A great way to capture the diverse emotions and personalities of people from different cultures.
Street Photography
Street photography is about capturing the true essence of life and society as they unfold in real-time. It’s centered around those unexpected and spontaneous moments that you stumble upon whilst wandering through alleyways, town squares, or crowded markets.
- Motto: Seize the unplanned, live in the moment.
Architectural Photography
Then, you might want to dabble in architectural photography, where the focus is on buildings, structures, and cityscapes. From towering skyscrapers to ancient ruins, there’s a lot to explore in this style. This style encourages a keen eye for detail, geometry, and symmetry.
- Motto: Spot the details, appreciate geometrical perfection.
Wildlife Photography
Lastly, if your travels take you on safari or into the wilderness, give wildlife photography a shot. The key to capturing animals in their natural habitat is timing and patience.
- Motto: Wait for the perfect moment.
Experimenting with various styles can add depth and diversity to your travel portfolio. While it might seem overwhelming at first, there’s no need to limit yourself to one approach. Remember, the aim is not only to bring back pictures but also to stumble upon a style that encapsulates your personal aesthetic. The joy of photography lies in capturing the world in your individual way.

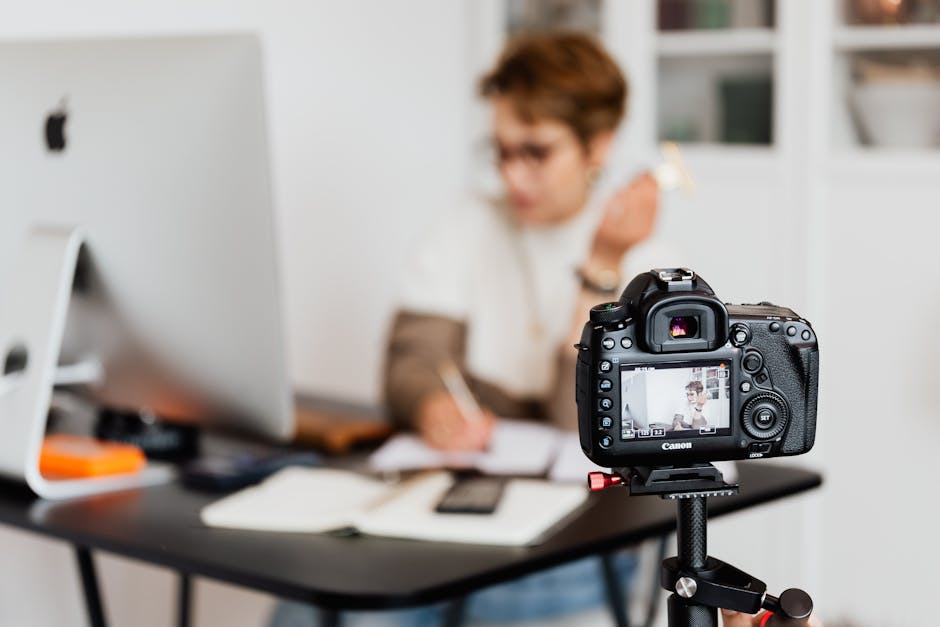
Post-Processing and Editing Tips
As momentous as hitting the shutter button may feel, clicking the picture is often just the first step in solidifying a travel memory. It’s what you do after, in the editing process, that can enhance and even transform your photos into real stunners. This post-processing stage is like the finishing touch, where your travel photos go from good to great.
The first step is choosing the right editing software. We aren’t all graphic designers, but tools like Adobe Lightroom and Photoshop, or their free counterparts like Darktable and GIMP respectively, make photo enhancement accessible to all. For more mobile-friendly options, consider Snapseed, Lightroom Mobile, or Instagram’s own built-in editing features.
Beginning with the basics of editing is advisable. These are simple tweaks such as adjusting the exposure, contrast, saturation, and white balance. The ‘brightness’ adjusts the overall lightness or darkness, ‘contrast’ fine-tunes the difference between the darkest and lightest areas, ‘saturation’ controls the intensity of colors, and ‘white balance’ influences the color temperature of your image.
Have you ever noticed how a breathtaking sunset can turn out lackluster in a photo? That’s where editing can step in. Tools like ‘shadows/highlights’ or ‘HDR mode’ can balance out light and dark areas, giving the photo a closer look to what your eyes see. But remember, subtlety is key: over-edited photos can look unnatural and lose their initial charm.
Additionally, many tools, filters, and presets can be used for specific editing aims. Want to draw the viewer’s attention to the dramatic cathedral against a cloudy sky? Consider upping the ‘clarity’ or ‘sharpness’. Want to make that beach sunset extra dreamy? A touch of ‘warm temperature’ or the right ‘preset’ could be the ticket.
Finally, consider learning how to crop and straighten your images, especially if they weren’t framed quite right in the camera. The simplest crop can radically improve the composition of your photograph, adhering to those rules of thirds or leading lines you’ve mastered from the earlier section of this article.
Remember, editing is an art in itself: a space where you can experiment, make mistakes, and find your unique style just like with your shooting techniques. It’s a playground to enhance and even reinterpret the way your original photo was visualized. No two photographers will edit a photo in exactly the same way – and that’s where the fun (and the magic) lies. As a travel photographer, you’re a storyteller – let post-processing be another tool for you to share your own visually compelling story.

Moving Beyond Auto Mode
There’s no denying that Auto Mode can be a lifesaver – particularly for beginners – with its ease of use and guaranteed results. But, if you’re aiming for exceptionally stunning and unique travel photos, relying entirely on Auto Mode might limit the progress of your photographic skills.
The Limitations of Auto Mode
Auto Mode, with its pre-set rules, often cannot cater to the creative nuances that make a travel photo-shoot memorable. So, it’s time to break away and explore other robust, more flexible shooting modes that your camera offers, like the Manual Mode, Aperture Priority Mode, and Shutter Priority Mode. These terms may seem daunting at first glance, but they’re not as intimidating as they sound.
Exploring Advanced Modes
-
Manual Mode: This gives you total control of everything. As the one in charge, you determine the aperture, shutter speed, and ISO according to your needs. This mode facilitates experimentation and rule redefinition to capture the exact photo you want.
-
Aperture Priority Mode: Here, you control the aperture while the camera handles the shutter speed. This mode shines when the depth of field (the zone of sharp focus) is vital, like in portraits with a stunningly blurred background or detailed landscape photography.
Transitioning Smoothly From Auto
Shifting seamlessly from Auto Mode to these advanced modes might seem challenging initially. However, a step-by-step approach can make the transition painless. Start by understanding how each setting influences your images. Practice changing these settings for the same shot until you’re familiar with their effects. And remember to be patient with yourself. It’s okay not to get it right the first time, or the second, or even the third. It’s all part of the learning curve as you move beyond Auto Mode and start taking control of your camera settings.
Practice and Patience
In the journey towards mastering travel photography, two companions are always along the way – practice and patience. Just as it sounds, these might be words you’ve heard a gazillion times, but that doesn’t make them any less true.
Think about it: no world-renowned photographer ever woke up one day just knowing how to capture the perfect shot. It took hundreds, even thousands of shots, most of which probably ended up deleted or discarded. That’s what practice means – the willingness to take one more shot, to give the scene one more chance, to try framing it in a different way. When you’re out on a miserable, rainy day, and nothing seems to be going right, it’s practice that encourages you to keep snapping, keep looking, and keep experimenting.
Now, you must be wondering: what about patience? Well, patience in photography is a peculiar sort of creature. It’s not just waiting around, twiddling your thumbs. Instead, consider patience as previsualising – a mental image of the photo you want to capture. Whether you’re waiting for the right amount of cloud cover for that epic landscape shot, or biding your time for an interesting subject to stroll into your perfectly composed street scene, it’s all part of being patient.
Let’s say you’re in a bustling market in Marrakech. You’ve spotted a scene, but just can’t seem to get the shot right. Here, patience means setting your camera down, taking in the sights and sounds, maybe even grabbing a tagine before trying again. Often, taking a step back allows you to see the scene in a fresh way and improves your chances of getting an exceptional photo.
The intricate dance of practice and patience will sometimes be grueling, and other times exhilarating, but it will always serve up lessons in spades. Embrace the process, and remember that each click of your camera strengthens your ability to capture the next big shot. Lastly, keep feeding your curiosity, don’t shy away from experimenting, and never, ever stop learning. Trust us, your photographs will thank you.
Conclusion
As we wind down this journey through the intriguing world of travel photography, let’s take a moment to recap the key points we’ve highlighted. We began with understanding the basics of photography, where concepts like aperture, shutter speed, and ISO play crucial roles. Then, we addressed the importance of choosing suitable cameras and equipment, along with diving into framing and composition, and how the rule of thirds or leading lines can help to enhance the aesthetic appeal of your photos.
We then transitioned into the magic of Golden Hour and the effective utilization of natural light, followed by exploring various photography styles like landscape, portrait, and street. We also emphasized the significance of post-processing in refining your photos, and the role of tools and software in this process.
Next, we moved beyond the auto mode, encouraging a shift towards more advanced modes like Manual and Aperture Priority for better control over your shots. Finally, we stressed the essence of practice and patience in mastering travel photography, emphasizing the concept of pre-visualising your shots for improved outcomes.
As you embark on this exciting journey of travel photography, remember that the true gem lies in continual learning and exploration. Whether you’re a professional photographer, a travel blogger, an influencer, or just a regular tourist aiming to capture mesmerizing shots, the world of photography opens up avenues for endless creativity and discovery.
Above all, remember that photography should not be seen merely as a means to an end, but as a process to be enjoyed. It’s not just about the final image – it’s about the experiences, learnings, and the joy of capturing moments that truly speaks to you. So, pack your camera bag and embark on this fascinating journey of lifelong learning in travel photography. May your experiences sharpen your skills and your passion light up your path. Safe travels and happy clicking!